Web interface
Tasks

The Tasks app allows you to add and delete tasks, edit their title, description, start and due dates and mark them as important. A task could be a meeting date reminder, a job that needs to be done, a personal or a group activity and a lot of other things.
In this short howto we'll see how it works.
Adding a new task
To start, click on + Add list..., write the name of your new list of tasks and press enter.
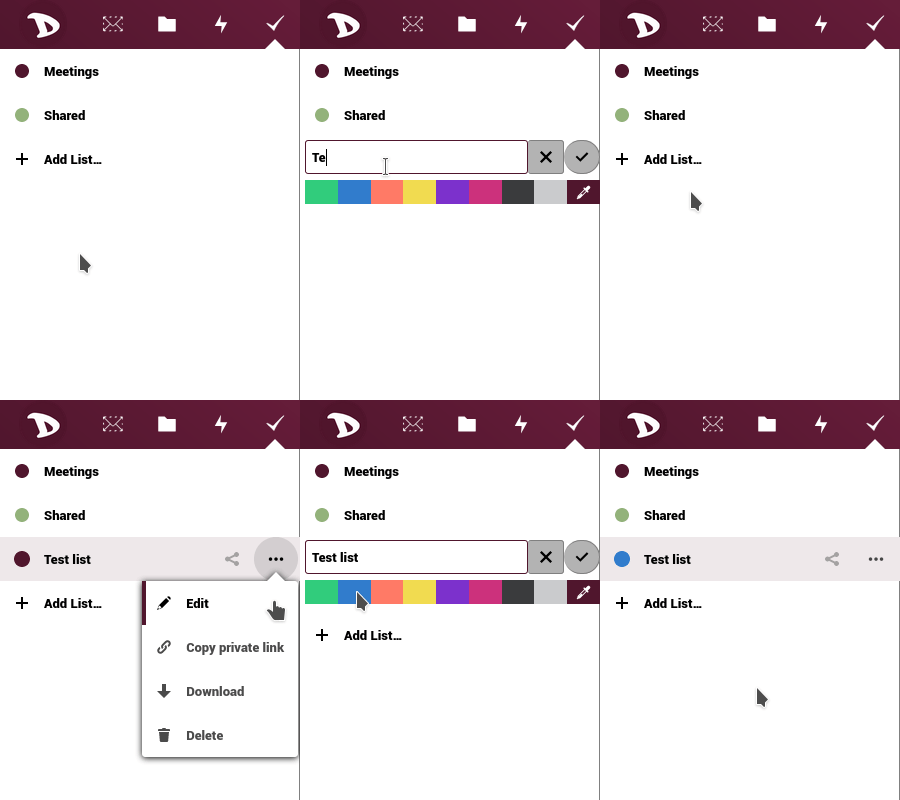
Once you did it, a new section will show at the right.

Type in the name of the new task you want to add and then press enter. Click on the three-dots icon at the right if you want to add subtasks.

Tasks options
Click on the task or subtask title to access the options.
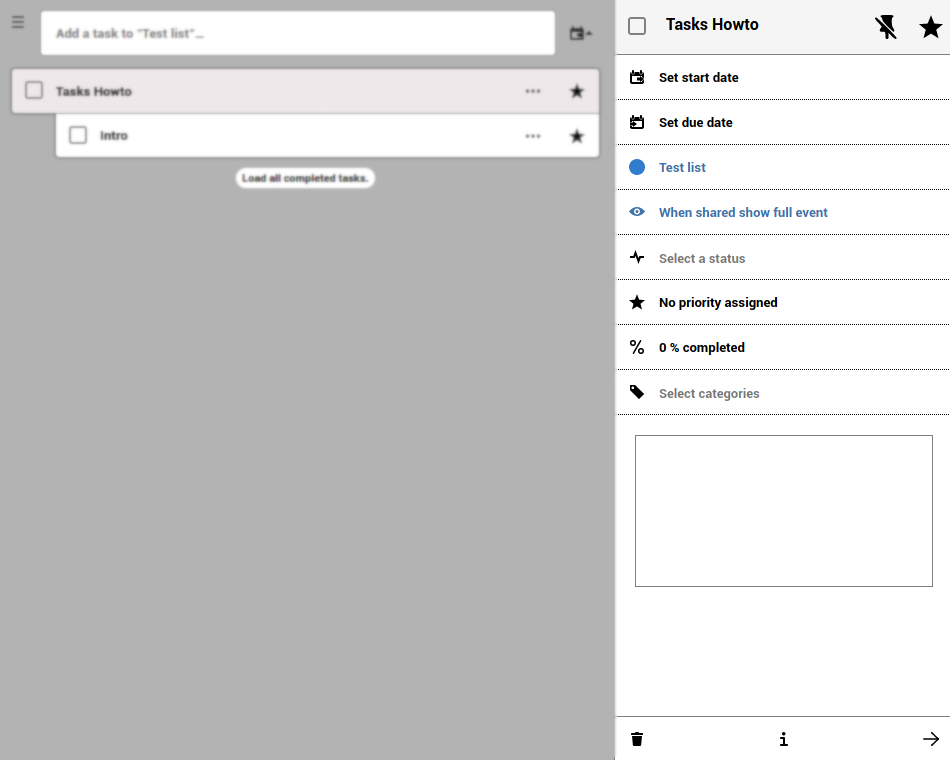
Here you can:
-
Set the start date and due date
By clicking on the Start/Due option you can set the day and the hour of it.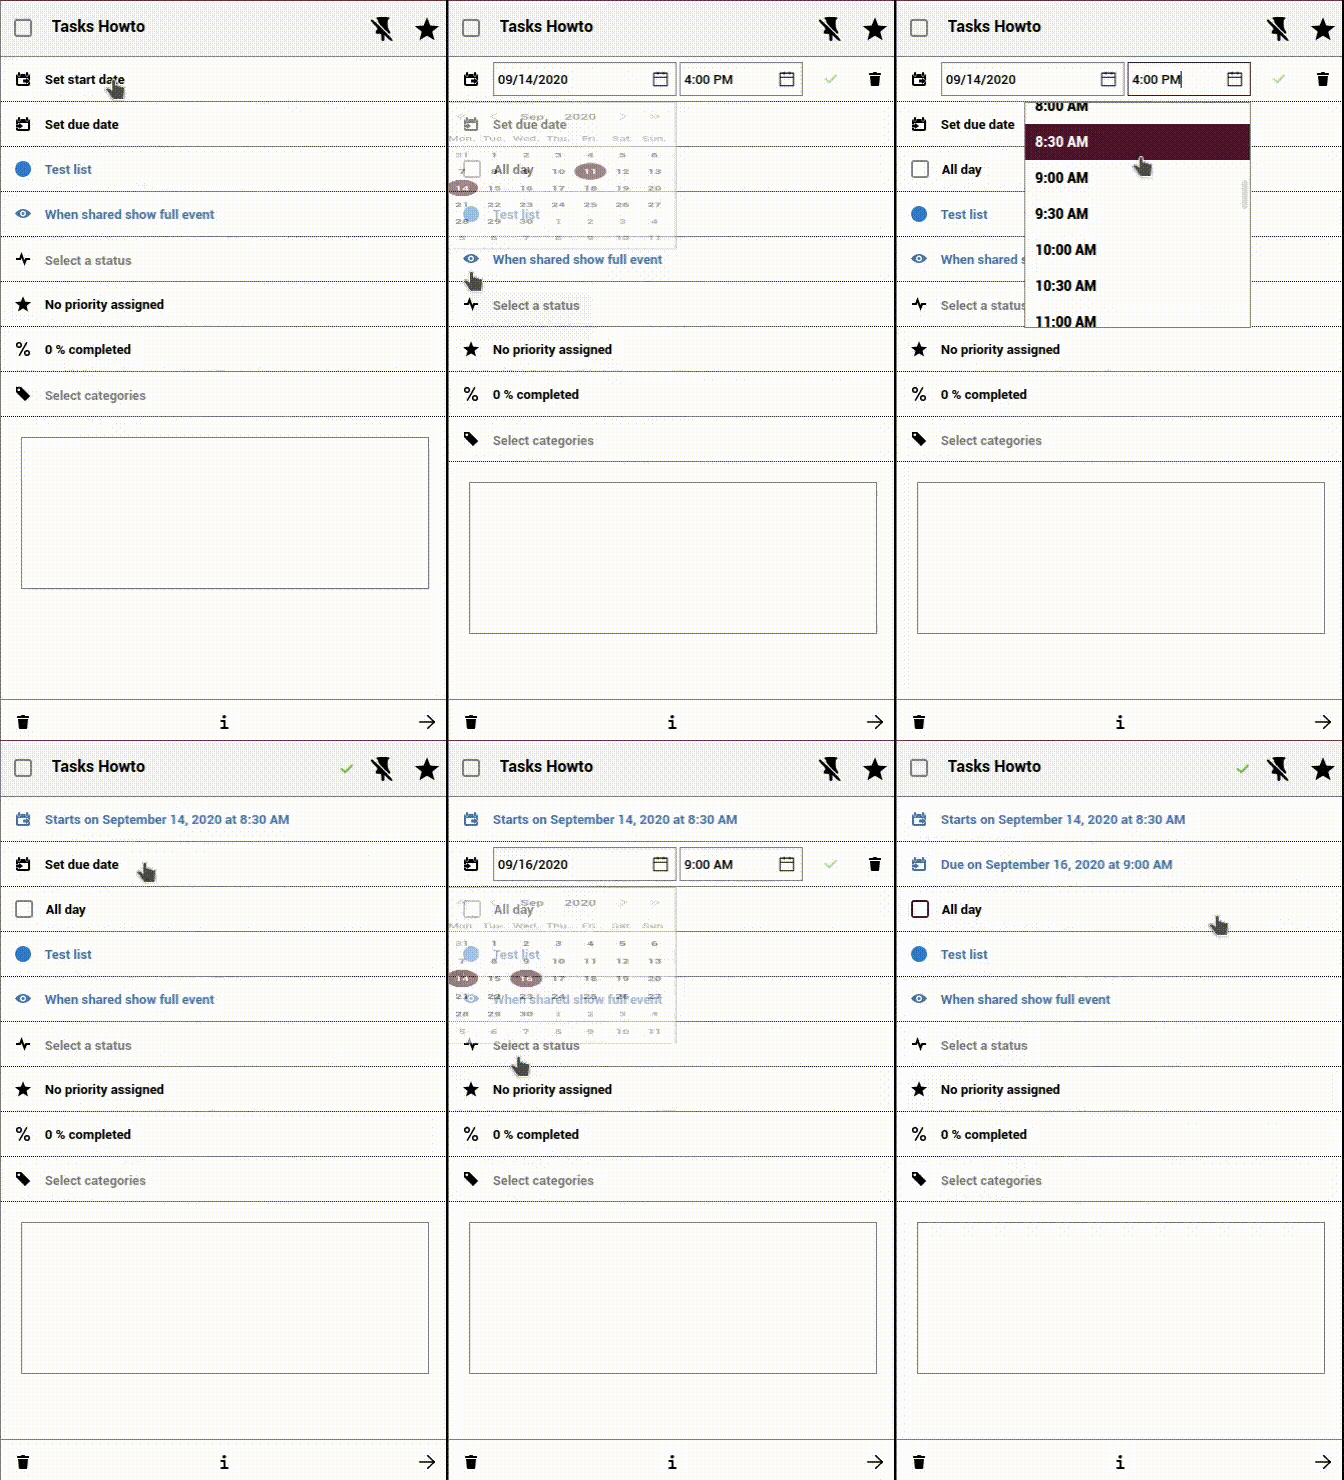
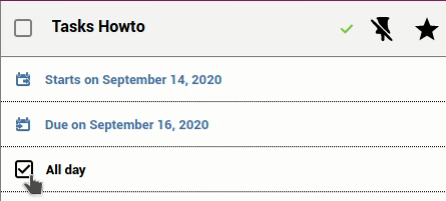
You can also set the task as an all day activity.
-
Assign / change the tasks list
You can change / assign a task or sub-task to different lists or calendar. Just select one from the drop-down menu and the tasks will change to the new one.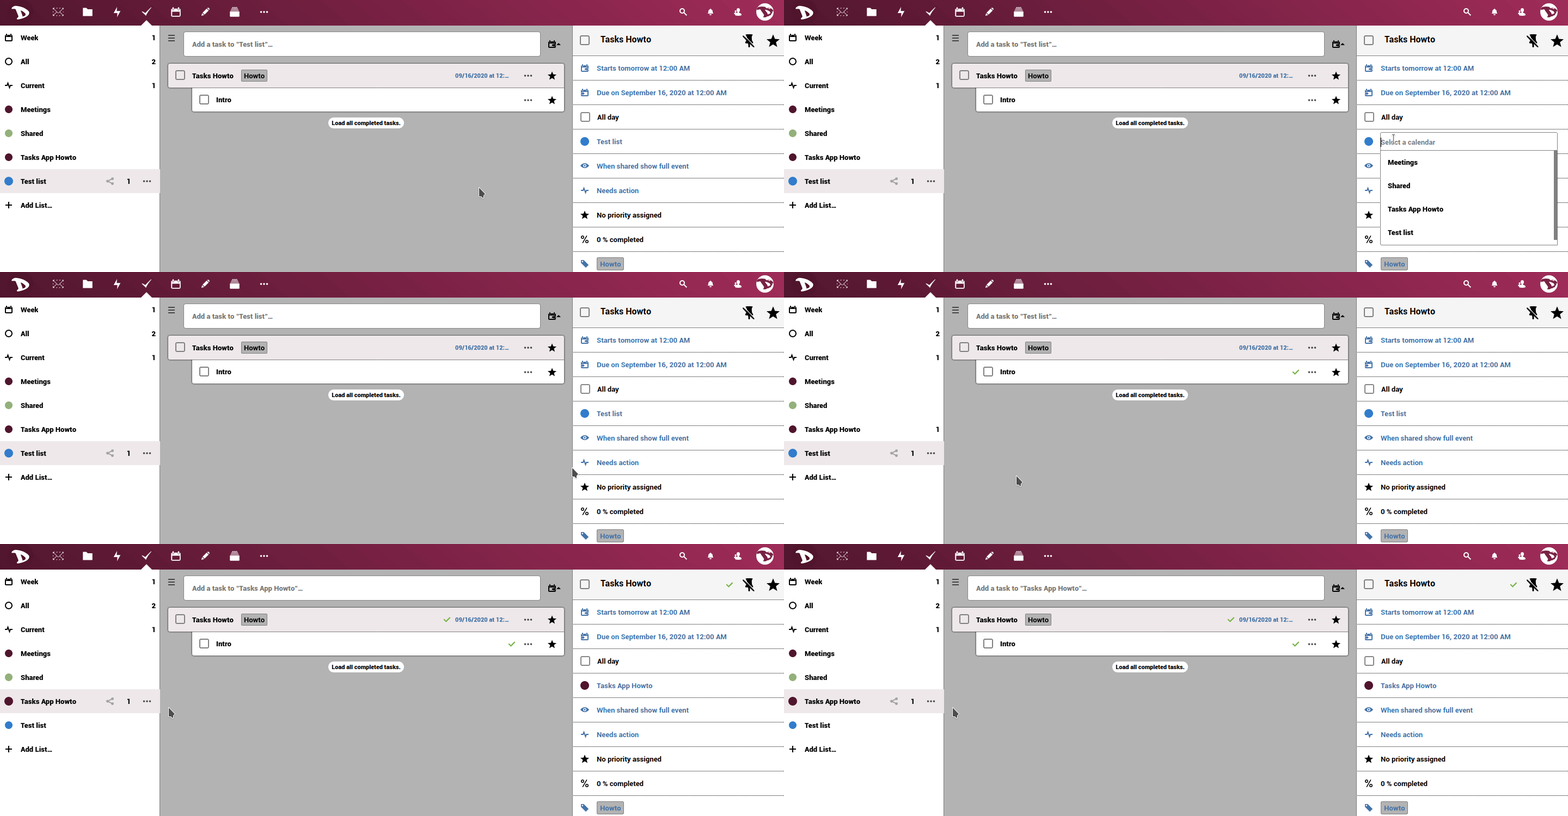
-
Select a classification
You can assign the task list to a previously created calendar and choose how it should be shown.
-
Select a status
Select if the task needs an action, if it is in process, completed or cancelled.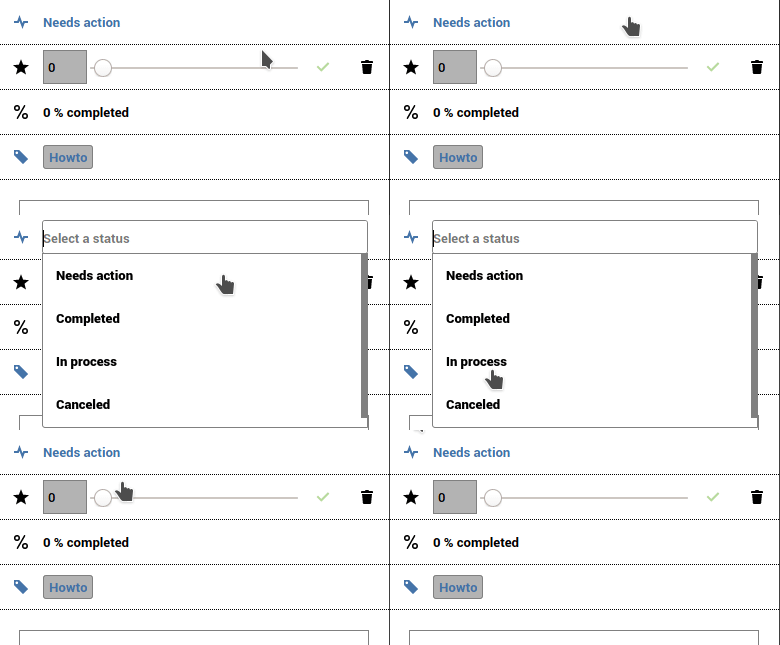
-
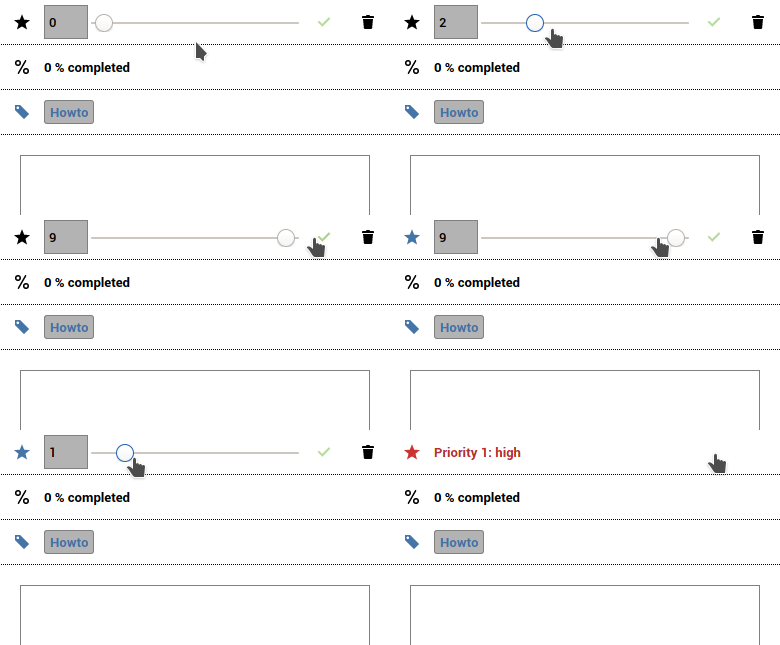
Assign a priority level to the task By moving the bar, you can set the priority level where 1 to 4 is High, 5 is Medium and 6 to 9 is Low.
-
Set and edit the progress level of the task
By moving the bar, you can set the task progress from 0% to 100%.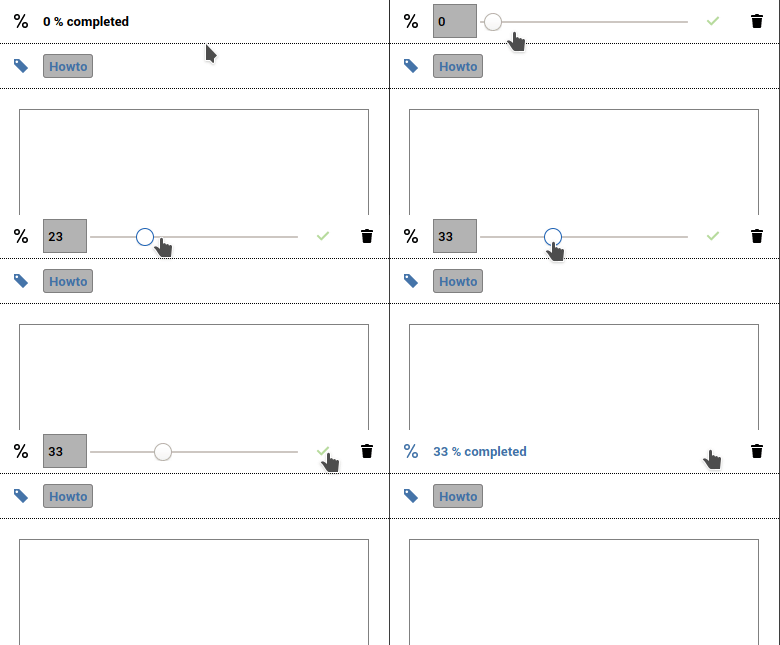
-
Categories and Comments
Assigning categories and adding comments can be very useful when working in a group. Click on Select categories, select or create one and press Enter. To write a comment, simply type it in the box.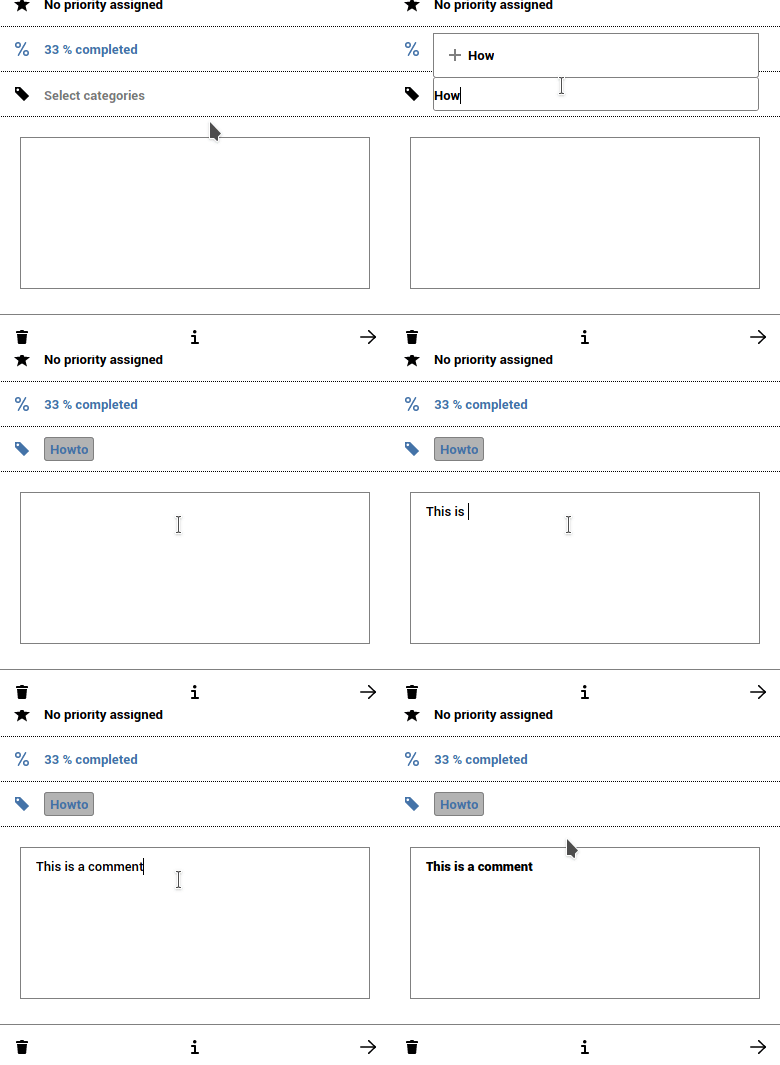
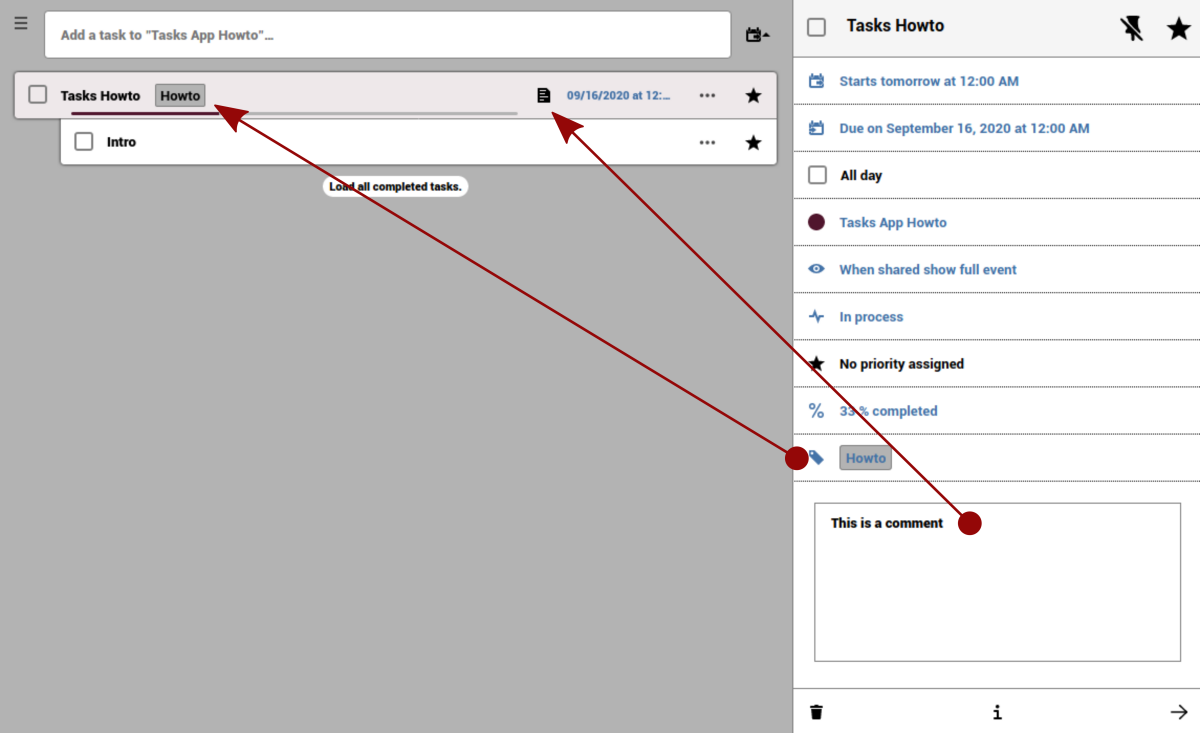
When the task has a category assigned or a comment added, you can see it in the description, next to the title.
-
Finally, at the bottom of the tasks details you will see a bar with the delete and info options.
